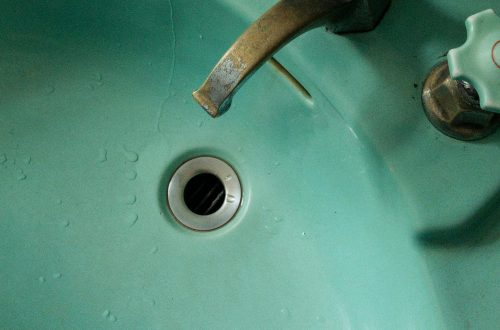
A dripping tap is more than just an annoying sound—it’s a waste of water and money. According to the EPA, a single leaky faucet can waste over 3,000 gallons of water per year! The good news? Fixing a leaky tap is often a simple DIY task that doesn’t require professional help. Whether it’s a worn-out washer, a loose part, or mineral buildup, these easy hacks will help you stop the drip fast and save water.
Identify the Type of Tap You Have
Before you start fixing your leaky tap, it’s important to know what kind of tap you’re dealing with. The two most common types are:
- Compression Taps: These have separate hot and cold handles and require tightening to stop water flow. They often leak due to worn-out washers.
- Ceramic Disc Taps: These have a single lever and rely on ceramic discs to control water flow. Leaks here are usually caused by damaged discs or seals.
Identifying your tap type will help you choose the right repair method and parts.
Gather the Right Tools
Having the right tools on hand makes the job easier. Here’s what you’ll need:
- Adjustable wrench
- Screwdriver (flathead or Phillips, depending on your tap)
- Replacement washers or O-rings
- Plumber’s tape (Teflon tape)
- Cleaning cloth or sponge
- Vinegar (for mineral buildup)
Most of these items are inexpensive and available at any hardware store.
Fix a Compression Tap in 5 Simple Steps
If you have a compression tap, follow these steps to stop the leak:
- Turn Off the Water Supply: Locate the shut-off valve under the sink and turn it clockwise to stop water flow.
- Remove the Tap Handle: Use a screwdriver to remove the handle’s cover and unscrew the handle.
- Inspect the Washer: Take out the valve stem and check the washer for wear or damage. Replace it if necessary.
- Reassemble the Tap: Put the new washer in place, reassemble the tap, and tighten all parts securely.
- Test for Leaks: Turn the water supply back on and check if the drip has stopped.
If the tap still leaks, the issue might be with the O-ring or valve seat, which may need replacement.
Fix a Ceramic Disc Tap Quickly
Ceramic disc taps are more durable but can still leak. Here’s how to fix them:
- Turn Off the Water: Shut off the water supply under the sink.
- Disassemble the Tap: Remove the handle and unscrew the cartridge housing.
- Clean or Replace the Cartridge: Check for debris or mineral buildup. Clean with vinegar or replace the cartridge if damaged.
- Reassemble and Test: Put everything back together and turn the water on to check for leaks.
If cleaning doesn’t work, you may need a new ceramic disc cartridge.
Prevent Future Leaks with These Tips
Once your tap is fixed, keep it leak-free with these simple maintenance tips:
- Use Plumber’s Tape: Wrap Teflon tape around threaded connections to prevent leaks.
- Check Washers Regularly: Replace worn washers before they cause leaks.
- Clean Aerators: Mineral buildup in aerators can cause pressure issues. Soak them in vinegar monthly.
- Avoid Over-Tightening: Tightening taps too much can damage washers and O-rings.
Regular maintenance can extend the life of your taps and save water.
Fixing a leaky tap is a simple DIY task that can save you money and conserve water. By identifying your tap type, using the right tools, and following these easy steps, you can stop the drip in no time. Remember, small leaks add up to big water waste—so don’t ignore that annoying drip! With these hacks, you’ll keep your taps running smoothly and your water bill low.