Greasy kitchen cabinets are a common problem in every household. Over time, cooking oils, food splatters, and grime build up on cabinet surfaces, leaving them sticky and dull. Not only does this look unappealing, but it can also attract pests and make your kitchen feel less hygienic. The good news? Cleaning greasy cabinets doesn’t have to be a daunting task. With the right techniques and a little elbow grease, you can restore your cabinets to their original shine. Here’s how to tackle greasy kitchen cabinets effectively.
Why Kitchen Cabinets Get Greasy
Before diving into cleaning methods, it’s helpful to understand why grease accumulates on kitchen cabinets. Cooking releases tiny oil particles into the air, which settle on nearby surfaces, including cabinets. Over time, these particles mix with dust and dirt, creating a stubborn, sticky film. Areas near the stove and sink are especially prone to grease buildup. Regular cleaning can prevent this, but if you’ve neglected your cabinets for a while, a deeper clean may be necessary.
Essential Supplies for Cleaning Greasy Cabinets
Gathering the right tools and cleaning solutions is the first step to success. Here’s what you’ll need:
- Mild dish soap – A gentle degreaser that cuts through grease without damaging surfaces.
- White vinegar – A natural cleaner that helps dissolve grease and disinfects surfaces.
- Baking soda – A mild abrasive for scrubbing tough grease stains.
- Microfiber cloths or sponges – Soft materials that won’t scratch cabinet finishes.
- Warm water – Helps loosen grease for easier cleaning.
- Olive oil or mineral oil – Optional for polishing wood cabinets after cleaning.
Step-by-Step Guide to Cleaning Greasy Cabinets
Follow these simple steps to remove grease and restore your cabinets’ shine:
1. Remove Loose Dirt and Dust
Start by wiping down cabinets with a dry microfiber cloth to remove loose dust and debris. This prevents spreading dirt around when you apply cleaning solutions.
2. Prepare a Cleaning Solution
Mix a few drops of dish soap with warm water in a bucket or spray bottle. For tougher grease, add a tablespoon of vinegar for extra cleaning power.
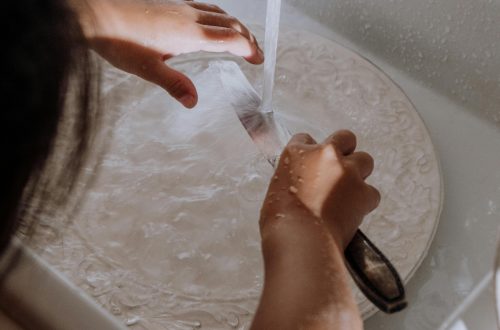
3. Scrub the Greasy Areas
Dip a sponge or cloth into the cleaning solution and gently scrub the greasy areas. Work in small sections, focusing on the worst spots first. For stubborn buildup, sprinkle baking soda on a damp sponge and scrub lightly.
4. Rinse and Dry
Use a clean, damp cloth to wipe away soap residue. Immediately dry the cabinets with a soft towel to prevent water damage, especially on wood surfaces.
5. Polish for a Shiny Finish
For wood cabinets, apply a small amount of olive or mineral oil to a cloth and buff the surface. This restores shine and protects the wood.
Natural and DIY Cleaning Solutions
If you prefer chemical-free cleaning, try these natural alternatives:
- Vinegar and Water – Mix equal parts white vinegar and water for a gentle degreaser.
- Lemon Juice – The acidity in lemon juice helps break down grease while leaving a fresh scent.
- Baking Soda Paste – Combine baking soda with a little water to form a paste for scrubbing tough stains.
Tips to Prevent Future Grease Buildup
Keeping your cabinets grease-free is easier with these preventive measures:
- Wipe cabinets weekly – Regular light cleaning prevents grease from accumulating.
- Use a splatter guard – Reduce oil splatters while cooking by using a stovetop splatter screen.
- Install a range hood – A good ventilation system helps capture airborne grease before it settles on surfaces.
- Avoid harsh cleaners – Stick to mild solutions to protect cabinet finishes.
Cleaning greasy kitchen cabinets may seem like a chore, but with the right approach, it’s quick and easy. By using simple household ingredients and following a consistent cleaning routine, you can keep your cabinets looking spotless and extend their lifespan. Whether you opt for a DIY solution or a store-bought cleaner, the key is regular maintenance. Start today, and enjoy a cleaner, fresher kitchen in no time!